This guide will help you to setup Stripe on your site to let your users pay their invoices online through direct credit cards payments!
Setup Stripe API keys
In order to use the Stripe Gateway add-on, you must first have a Stripe.com account. It’s free to create a Stripe account, and testing it is also free. Once you have purchased the Stripe Gateway add-on, install it just like any other WordPress plugin. After it is installed and activated, go to Settings → WP Customer Area → Payments → Stripe, and enable the gateway:

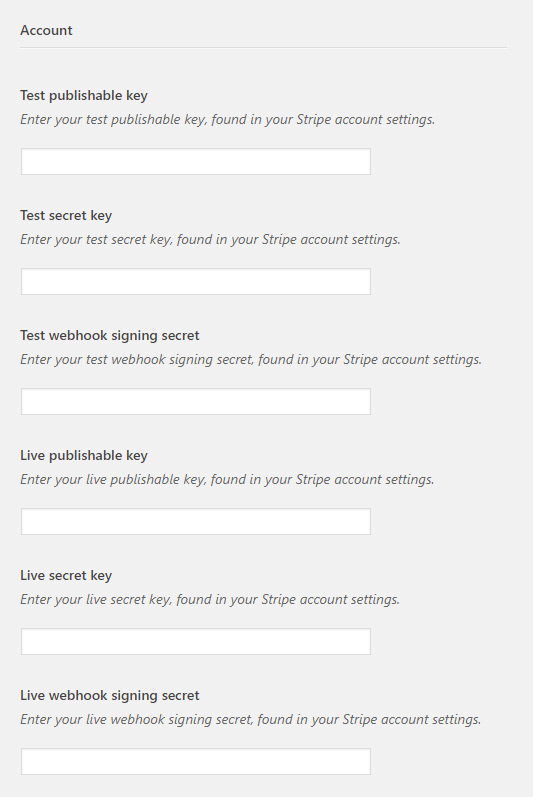
Next, you’ll find six fields in which you will need to enter your Stripe.com API keys. To obtain these keys, go to your Stripe.com Dashboard and click on “Your Account” and then choose “Account Settings”. This will open a new window, from here choose “API Keys”.
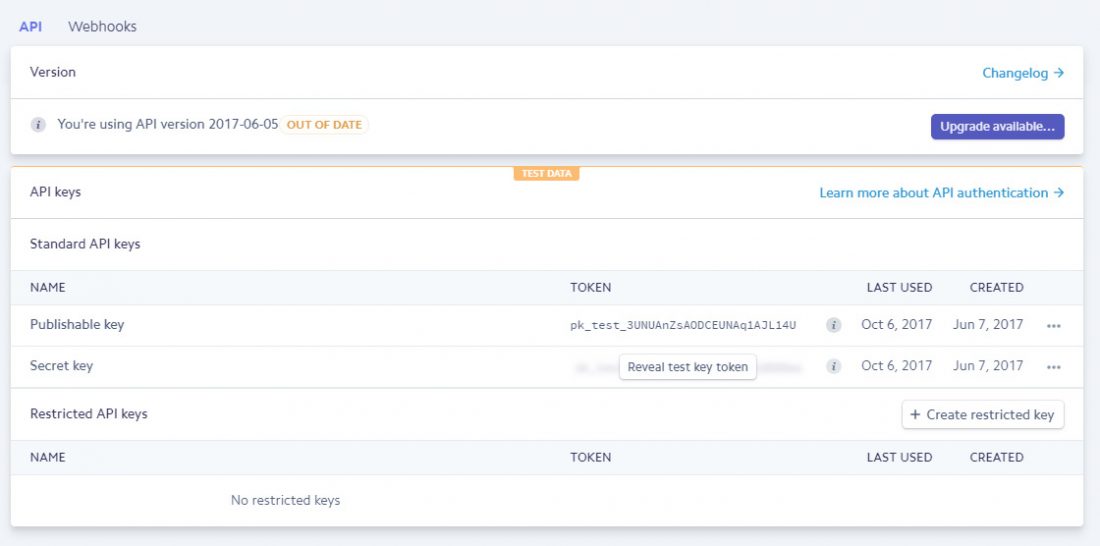
Copy and paste the Publishable key and Secret key found on that page into the WP Customer Area’s “Stripe Settings” section, to both “Test” and “Live” fields.
Note: Stripe requires an SSL certificate. See our SSL FAQ for more information.
Setup Stripe test mode
Fields for whom the label start by “Test” are used when the checkbox “Enable test mode. No payments will be processed.” is checked. As said, when using this mode, no payments will be processed: it is useful to test your Stripe account behaviors. Additionally, you can check the Stripe’s testing documentation.
Setup Stripe webhooks
Webhooks are used by Stripe Gateway add-on in order to communicate with your Stripe account. For instance, it will allow the add-on to automatically detect refunded purchases in your Stripe account. When a refund is detected, the corresponding payment in WP Customer Area is also marked as refunded.
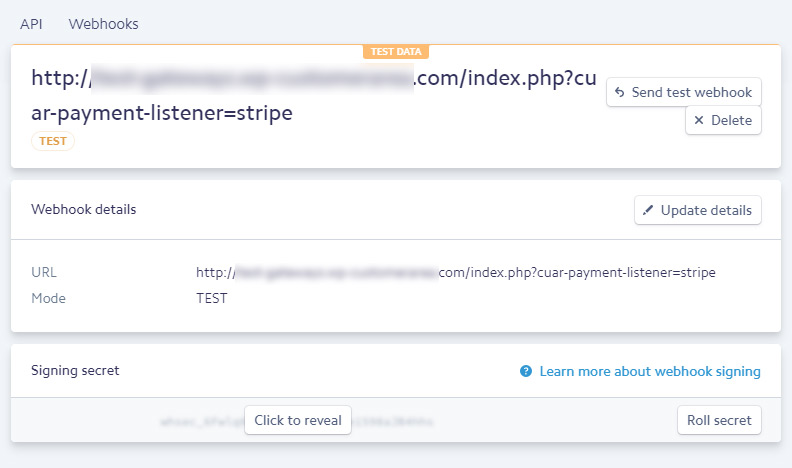
In order to use this feature, you must add a Webhook URL from your site into your Stripe Dashboard → Settings → Webhooks. The URL that should be set is given in your Payments settings.

Click on “Add Endpoint” and paste the URL given in your Stripe settings.

Then, simply click on that webhook, so you can access the Webhook Signing Key, and add it to your WP Customer Area settings.
Job done!
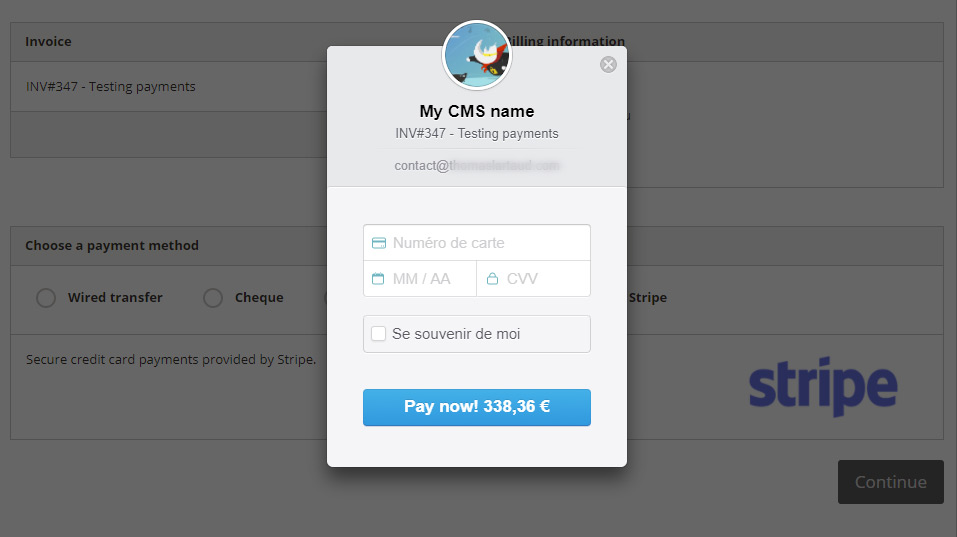
Now that you have setup Stripe, you can create a new invoice with some items, assign it to yourself to try out the features, optionally enable the “test mode” in WP Customer Area payments settings, view the invoice on the frontend, click on Pay, and select Stripe.
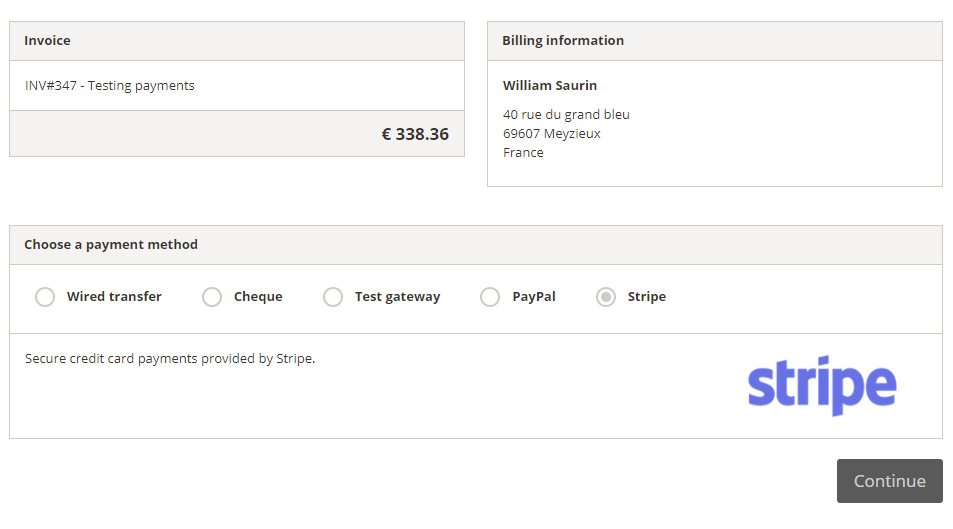
Click on continue and you will then be able to enter your credit cards numbers and pay the invoice online.
Debugging
If you are suspecting an issue, you can “enable error logging to a file” in order to get some useful pieces of information from the Stripe Gateway add-on. This file will be stored in /wp-content/customer-area/logs.

