You may want to generate invoices for your clients and make them automatically listed on their dashboard, this is made possible with the Invoicing add-on for WP Customer area. This documentation is going to help you getting started with this add-on.
Setup
The Invoicing add-on can be easily installed by downloading the corresponding ZIP file directly from your account page. If you do not how to proceed, please refer to our guide about how to install add-ons.
General configuration
Take a look at the settings page for WP Customer Area and click on the Invoicing tab. You will find there options like address fields, defaults options, additional texts and some integration options for the frontend.
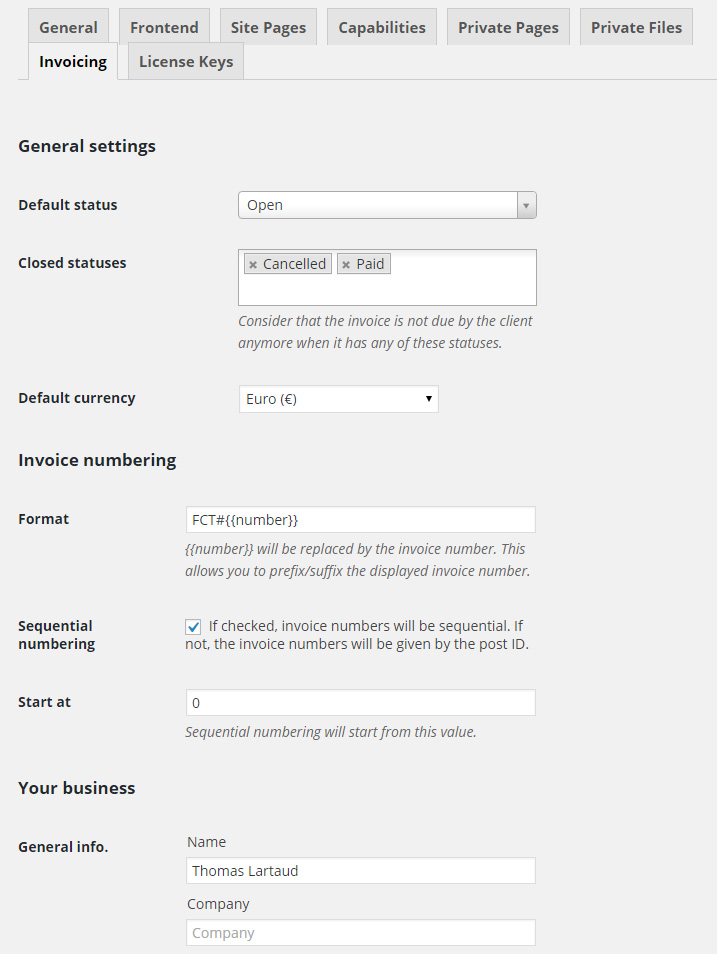
| Option | description |
|---|---|
Default status |
Specify the status that will be set by default when an invoice is created. |
Closed statuses |
Assign the statuses of your choice to let WP Customer Area consider the invoice as “closed” when one of those statuses is assigned to it. |
Default currency |
Select the default currency that will be used for each newly created invoice. This option can be overridden for each invoice. |
Format |
Enter a new custom syntax to use for your invoice IDs. The string {{number}} will be replaced by the invoice ID. For example, using “WPCA-{{number}}-XX” will generate invoice IDs such as “WPCA-201-XX”. |
Sequential numbering |
Check this box to let WP Customer Area increment your invoices IDs each time you create a new invoice. If the box is unchecked, the invoice ID will be the ID of the WordPress Post. |
Start at |
If you choose to use sequential numbering for your invoices IDs, you can decide from which number to start from. |
Business infos |
Those fields allow you to provide information about your business and will be printed on your invoices (logo, address, VAT number, etc.) |
Texts |
You can add a custom page header and footer to show on each of your invoices. |
Frontend Integration |
Several options that allow you to choose how many invoices to show on the dashboard, etc. |
Permissions
Like any other add-on for WP Customer Area, you should check the permissions are correctly set. To do that, check your WordPress administration panel, and navigate to the menu Settings -> WP Customer Area -> Permissions to make sure that your users are allowed to see their invoices.
Please, refer to our documentation about permissions for more information.
Creating a client user
In order to make sure that you can fully test this add-on, please check that your site contains at least one additional user. If it’s not the case, you can create a new user to test the add-on.
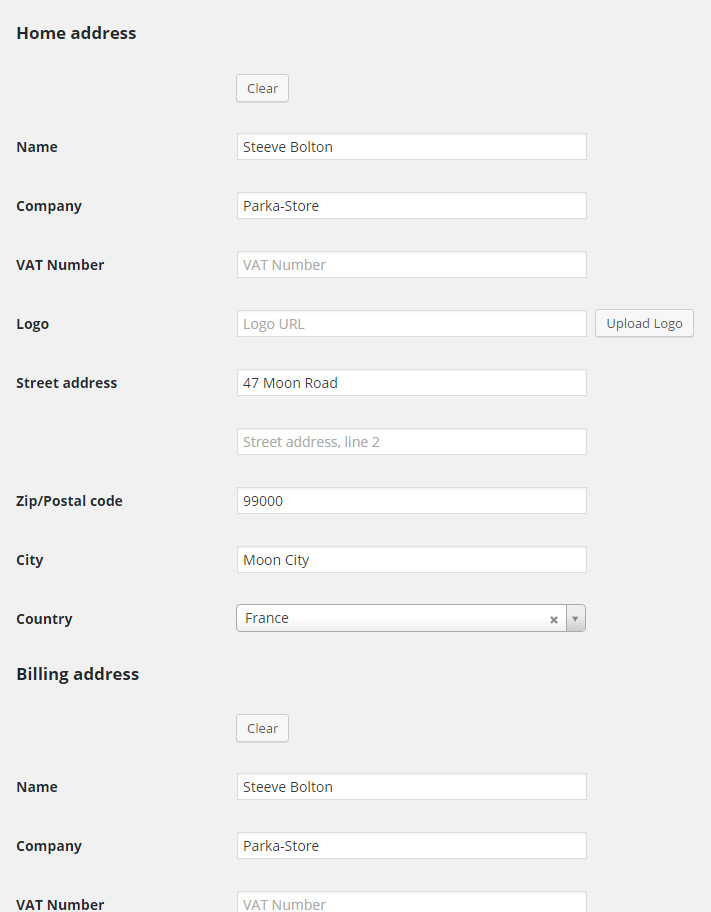
Once you have created this new user, you can edit his profile, and you will notice new fields inside Home address and Billing Address sections. You can fill-in those fields and update the profile.
Note : The home address is not used by the Invoicing add-on, it’s only added for your personal use.
Creating your first invoice
Start by creating a new invoice by going into your WordPress Panel and navigating to the menu WP Customer Area -> Invoicing and by clicking on the Add invoice button. Choose a title for your invoice (eg: New Webdesign for Steeve Bolton’s Website).
Assignment
Select the user that you would like to assign this invoice to.
Note: invoice assignment is compatible with the Projects add-on, the Additional owners types add-on and all others add-on related to content ownership (groups, owner restrictions, etc.).

Billing address
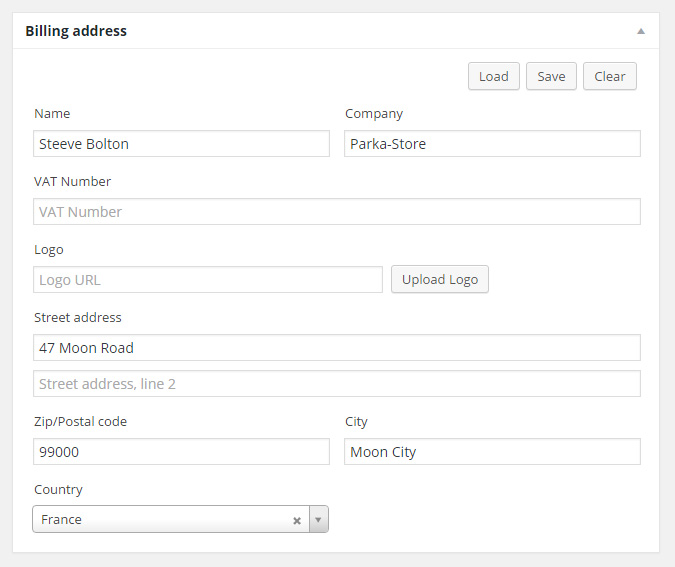
Now that the owner of the invoice has been assigned, you can click on the load button to grab the billing address set in his profile data. This allows you to edit it in case some information is different for this specific invoice.
Once the data is loaded like on the screenshot below, you can edit it and click on the save button to update the user profile. If you want to use different information without editing the user profile, you can simply save the invoice like a normal WordPress Post by clicking the update button on the top right corner of the screen.
Invoice items
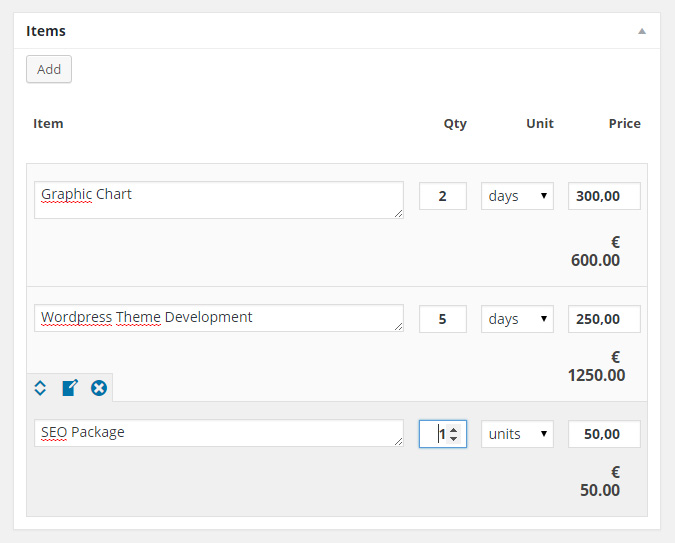
You can now add items to your invoice.
Click on the Add button to insert a new item to the invoice and choose the quantity, the unity, and the price. Sub-totals and totals will automatically be calculated.
Taxes
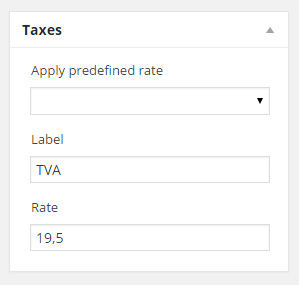
WP Customer Area allows you to apply a tax to your invoice. You can give it a label and a rate.
You will also notice a dropdown menu showing predefined rates. This allows you to quickly use your usual tax rates when you create an invoice to save typing. By default, only the No taxes option is available, but you can create your own predefined rates by using this code snippet.
Discount
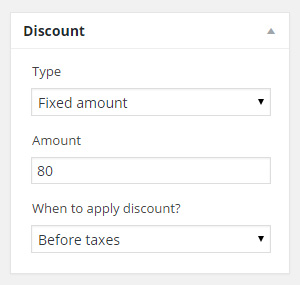
You can also apply a discount to your invoice (fixed amount or percentage) and choose if you want to apply it before or after the taxes.
Invoice properties
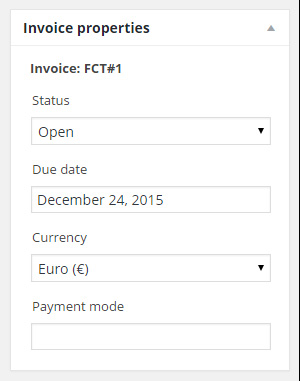
At any time, you can edit the general invoice properties and the status (by default: open, paid, cancelled), set a due date, the currency used, and the payment mode used once the invoice got paid.
Invoice totals
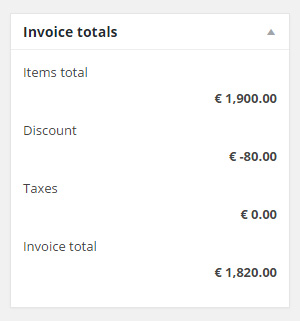
Once you completed the invoice, you can easily check if the result is correct.
View invoice
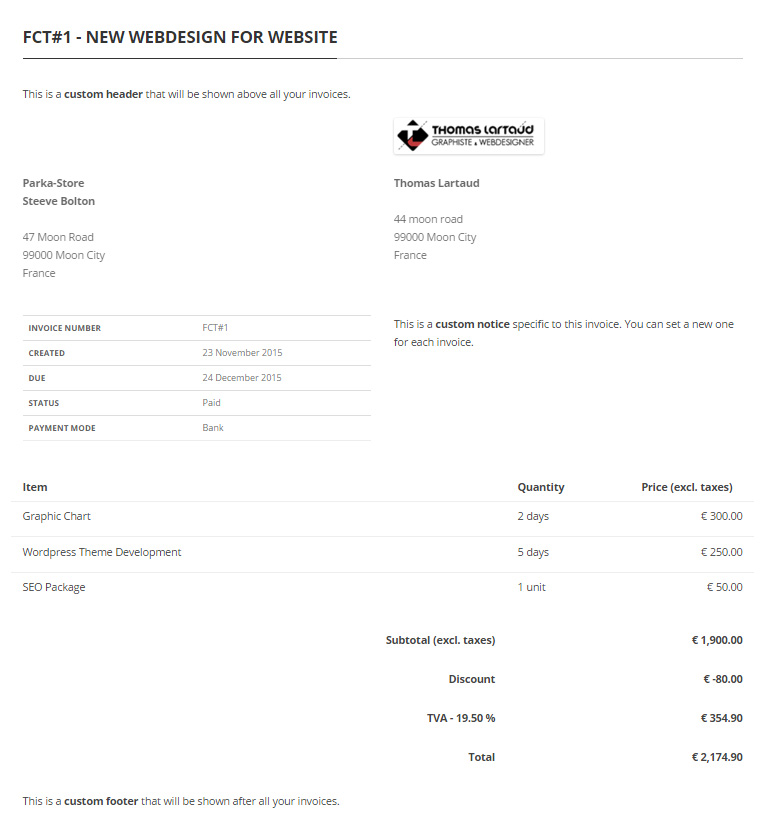
Click on the View invoice button to see it on your site.
Manage invoices statuses
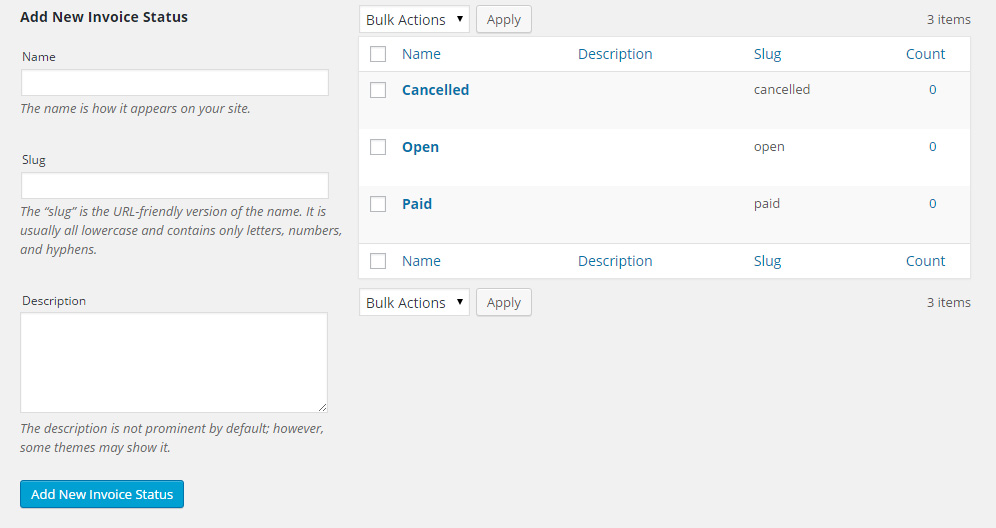
You can add custom statuses to your invoices by going to your WordPress Panel, then to WP Customer Area > Invoicing and finally clicking on the Manage invoice statuses button.
They behave like categories for WordPress blog posts and can be used for your invoices only.
If you add or edit statuses that represent a closed state for the invoice, you should add them to the invoicing settings page.
List and filter invoices
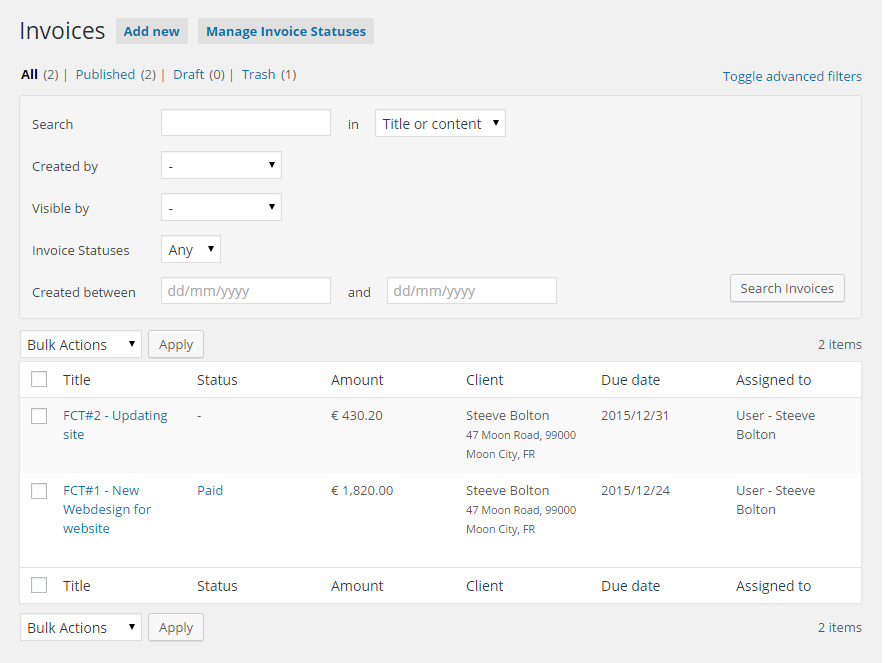
You can have a lot of invoices to list on your site. WP Customer Area provides you an invoice listing page with advanced filters to help you search and find your invoices easily.
Conclusion
Congratulations! You have completed this tutorial and are now ready to manage your client invoices. If you are missing something, do not hesitate to contact us via our forum support to make suggestions, feature requests or ask for help.

