Installation
To install the Bulk Import add-on, please refer to our documentation about installing add-ons as there is nothing particular about Bulk Import. You also have nothing to setup, the add-on does not have any specific settings.
By default, only the administrators will be able to use the bulk import feature. If you want other users to be able to use it too, you will need to adjust the permissions from the screen: Settings > WP Customer Area > Capabitilies > General. You can then activate the « Bulk creation of private content » permission for any role you wish to allow.
Usage
The bulk import process will consist in a few steps:
- first you need to write your JSON file, describing all the posts ou want to import, as described below
- then you need to upload any attachment file (required for cuar_private_file post types) in a particular folder on your server (default to wp-content/customer-area/ftp-uploads)
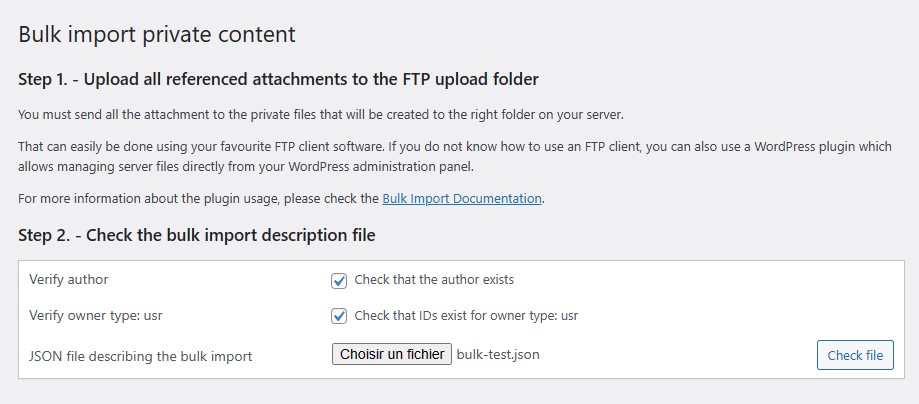
- then you need to upload that file to the bulk import page and validate it (WP-Admin > Private Area > Bulk Import)
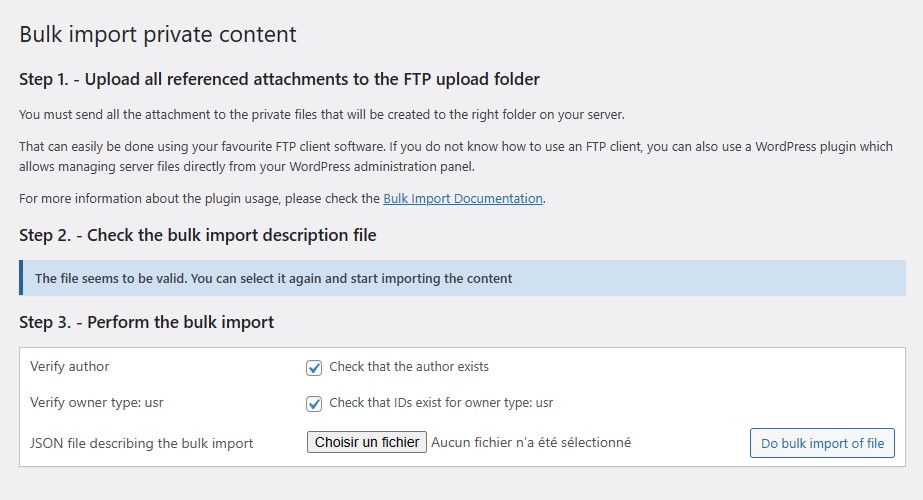
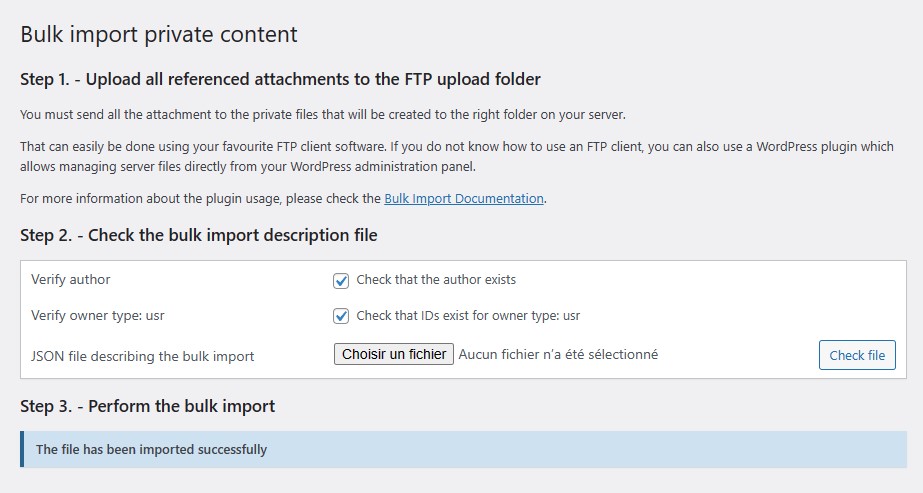
- if WP Customer Area tells you that the file is valid, you can then start the import process and all the posts included in the JSON file will be imported
This is basically a resume of the 4 steps required to complete the process. For more information, please check the details given below.
Pre-requisite : understanding the JSON file format
This add-on is actually developer-oriented and require that you have a bit of understanding about how a JSON file should be written. It is actually up to you to write this file, manually, or even programmatically, and to follow the expected structure so that WP Customera Area can parse it and import the content accordingly. Before going further, let’s briefly resume how a JSON file works.
A JSON file is basically a text file with some particular syntax. You can validate your JSON file using this free service: JSON Lint.
The root array
The root of the JSON file is a JSON array containing one JSON object for each of the private content you want to create.
[
 {
   // this is the first content to create, see below for the syntax
   // Notice the comma to separate this item from the next one.
 },
 {
   // this is the second content to create, see below for the syntax
   // Notice the comma to separate this item from the next one.
 },
 {
   // this is the third content to create, see below for the syntax
   // as this is the last one, we do not put a , after the }
 }
]
The objects
Each object describing private content is described very similarly using a series of properties. Some of those properties are common for all types of content, some are specific to some content types.
Properties are named. The name is enclosed in double quotes, followed by a colon and then by the value. Properties are separated by a comma. The last property should not be followed by a comma. Here is an example of how to write some valid JSON object and properties.
{
 "numeric_property" : 12,
 "text_property" : "Lorem ipsum",
 "array_property" : [1, 2, 3, 4],
 "object_property" : {
   "a_nested_property" : 123
 }
}
Mandatory properties
Now that you basically know how a JSON file should be written, you can take a look at the below table, showing most of the properties.
In any case, type and owners properties are required.
| name | values | description |
|---|---|---|
type |
|
Type: String Must be one of those valid private content types from WP Customer Area. |
|
|
|
Type: Object An object to describe how to assign the private content. Each property is an owner type, with a corresponding value representing the owner IDs. |
Examples
In the below example, we will create a private page, and it will be accessible to the users with ID 1 and 3 and to the users belonging to the project with ID 80:
{
 "type" : "cuar_private_page",
 "owners" : {
   "usr" : [1, 3],
   "prj" : [80]
 }
}
Optional properties
| name | values | description |
|---|---|---|
|
|
– |
Type: String The author ID of the post. |
|
|
– |
Type: String The title of the post. |
|
|
– |
Type: String The content description of the post. |
|
|
– |
Type: String The excerpt of the post. |
|
|
|
Type: String This must be one of the valid WordPress post statuses like |
|
|
– |
Type: Object An object with keys and values matching the post meta fields to set. This can be useful for example when you are using Advanced Custom Fields and our ACF Integration add-on. |
Examples
In the below example, we will create a private page, created by the user with ID 2, assigned to all administrators on the site, but we’ll create it as a draft post instead of directly publishing it.
{
  "type" : "cuar_private_page",
  "title" : "This is a test title",
  "content" : "This is a test content",
  "excerpt" : "This is a test excerpt",
  "author" : 2,
  "status" : "draft",
  "owners" : {
    "rol" : ["administrator"]
  }
}
Post types related properties
For some of our post types, you can also add additional data. You’ll be able to import:
- Attachment files for private files posts
- First step: copy the attachment files to your server using FTP
Prior to the bulk import, you must send all the attachment files to your server in the WP Customer Area’s FTP uploads folder. You can do this using any FTP client software (for instance the open source one named Filezilla). By default, this folder is located in wp-content/customer-area/ftp-uploads. - Second step: list the attachments and describe how to link them to the private file post
Once your files are in the FTP uploads folder on your server, you must describe how to attach them to the private content in the JSON file. If you own the Enhanced files add-on, you can even attach more than one file to the private document.
- First step: copy the attachment files to your server using FTP
- Tasks for tasklists posts
- Replies for conversations posts
| name | post type | description |
|---|---|---|
|
|
cuar_private_file |
Type: Object An object to describe how to attach files to the post. Each property is the name of the file located into the FTP folder, with a corresponding value, which is also an object, including the following properties:
Enhanced Files add-on required to be allowed to insert multiple objects. |
|
|
cuar_tasklist |
Type: Array An array of objects to describe how to attach tasks to the post. Each object represent a task that should include the following properties::
Tasks add-on required. |
|
|
cuar_conversation |
Type: Array An array of objects to describe how to attach replies to the post. Each object represent a reply that should include the following properties::
Conversations add-on required. |
Examples
In the below example, we will create a private file post, titled “Your invoices”, assigned to the user with ID 3, and with two attached files.
{
  "type" : "cuar_private_file",
  "title" : "Your invoices",
  "attachments" : {
    "Invoice_3320959.pdf" : {"method" : "copy"},
    "Invoice_2101122.pdf" : {"method" : "move", "caption" : "Your invoice 210112"}
  },
  "owners" : {
    "usr" : [3]
  }
}
In the below example, we will create a tasklist post, titled “My tasks”, assigned to the user with ID 1, and with three included tasks.
{
  "type" : "cuar_tasklist",
  "title" : "My tasks",
  "owners" : {
    "usr" : [1]
  },
  "tasks": [
    {
      "description" : "First thing first",
      "order" : 50
    },
    {
      "description" : "Third things third",
      "order" : 500
    },
    {
      "description" : "Second things second",
      "order" : 145
    }
  ]
}
In the below example, we will create a conversation post, titled “Just talking”, where the author is the user with ID 1, the recipient is the user with ID 2, and with three included replies.
{
  "type" : "cuar_conversation",
  "title" : "Just talking",
  "author" : 1,
  "owners" : {
    "usr" : [2]
  },
  "replies": [
    {
      "content" : "First reply",
      "author": 1
    },
    {
      "content" : "Second reply",
      "author": 2
    },
    {
      "content" : "Third reply",
      "author": 1
    }
  ]
}
Complete step by step example
Step 1: Prepare your JSON file
Create a text file, paste the following content into it, and then rename it to something like bulk-import.json
Note: For demonstration purposes, we intentionally integrated two errors into this example to let you see the whole process.
[
  {
    "type" : "cuar_private_page",
    "title" : "Hello world",
    "content" : "This is a test",
    "author" : 2,
    "owners" : {
      "usr" : [1, 3],
      "unknown": ["This line will trigger an error"]
    }
  },
  {
    "type" : "cuar_private_page",
    "title" : "This is a test title",
    "content" : "This is a test content",
    "excerpt" : "This is a test excerpt",
    "author" : 2,
    "status" : "draft",
    "owners" : {
      "usr" : [99999999]
    }
  }
]
Step 2: Validate the JSON file
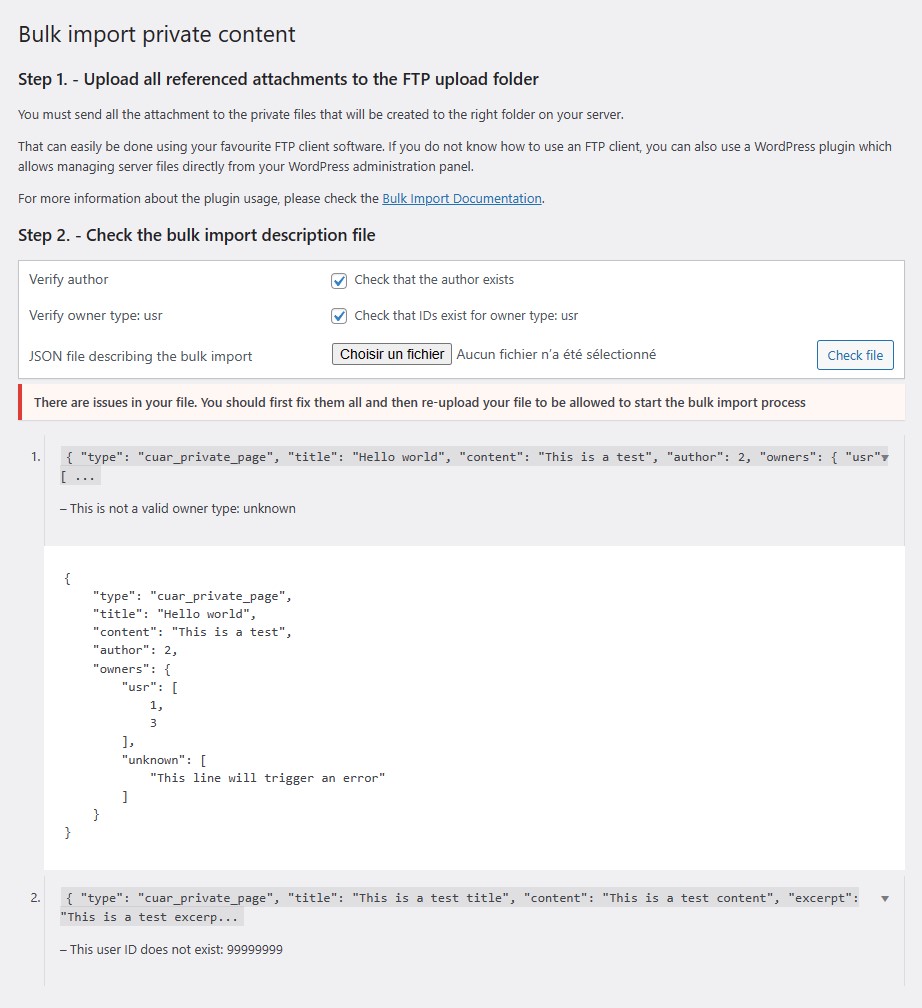
Navigate to Private Area > Bulk Import, upload your file, and click the “check file” button. WP Customer Area will perform several checks to make sure, for instance, that the syntax of your file is valid, or to check that any given user ID actually exists. If there is anything wrong detected during the check, the posts won’t be imported, but you’ll be prompted to fix the errors instead.

In the screenshot below, we can see that the two errors we added in the above example are preventing the JSON file to be validated. To fix that, we’ll need to edit the JSON file, remove the “unknown” owner type, which is actually not a valid owner type, and fix the user ID that does not exist.

You’ll need to repeat the whole step 2 until your file is validated.
Step 3: Once validated, re-upload your file again and start the import process
Once you successfully validated the file on the previous step, re-upload the file again, and start the import process.


