Step 1 – Create a user account « Client »
We will simulate a basic client area with on one hand, an administrator who publishes content, and on the other hand, a client who accesses the shared content from the website (front-office).
Thus, as an administrator, let’s open the Users > Add New page and fill the form as indicated below:
- Username: for example, we will use ‘client’ which will be our test user
- E-mail: set the client’s mail. Useful for lost password.
- First/Last Name: fill these fields, although optional
- Password/Repeat password: write twice the same password
- Send the password: don’t check this now, unless you want the user receives his password in his mailbox
- Role: select Subscriber, the basic role that WordPress provides is perfect for our first private area
For more information, refer to the official documentation on WordPress Roles and Permissions.
Step 2 – Management of private content
WP Customer Area is based on custom post types to manage your private files and pages. In this way, we get a management interface that is familiar to you as it looks like the one for regular posts or pages.
Your first private file
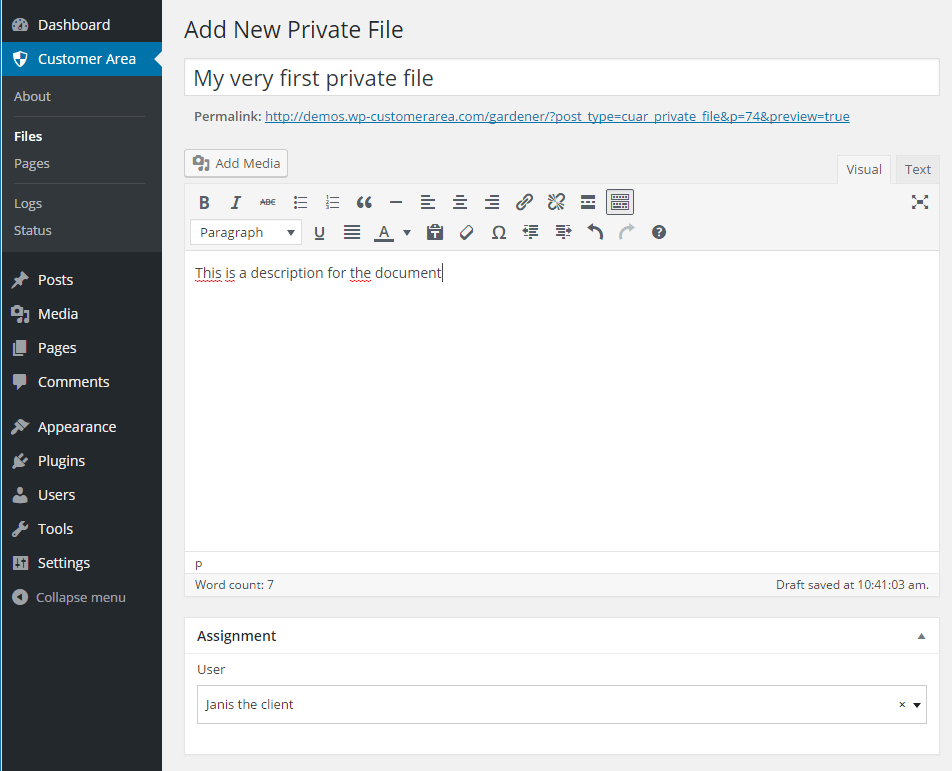
In the Customer Area menu, click New private file.

The WordPress content editor appears:
- Let’s start with a title to the private file
- Use the content area to enter a detailed description
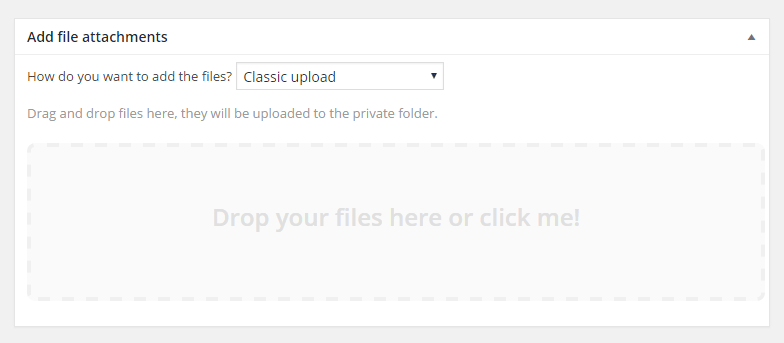
- In the File box, we have two upload methods:
- Direct upload (default mode): click on the gray zone to pick a file or simply drag and from one on that zone directly from your computer
- Copy from FTP folder (advanced mode): to do this, we need to use an FTP client (e.g. Filezilla) to drop files into a directory defined in the WP Customer Area settings. Note that this method is particularly useful for large files and is better suited for advanced users

Choosing the upload method
- In the Assingment area, indicate which user will have access to the file. This is where we will find our test user we called « client ».

Choose the user who will be able to see and download our file - Click Publish once all the required data is added. You can then click on View private file to see the final result.
Your first private page
The creation of a private page is very similar to creating a private file. Let’s go to Customer Area > New private page:
- Give a title to your page
- Enter the description in the content area
- Assign it a category page (optional)
- Assign the page to our user ‘client’ who will be able to view this private content
- Click on Publish to validate the creation

