WP Customer Area add-ons operate like any other WordPress plugin with two exceptions:
- They are not available for free on the official plugin repository;
- They require the main WP Customer Area plugin to be activated
Installation procedure
- Download the extension from the email received after your purchase. Note that you can also access your account from the store to download the purchased add-ons
- Let’s go to Plugins > Add New in your WordPress admin panel
- Upload the ZIP file you have downloaded earlier and then click on the Install Now button. The install procedure starts automatically and you simply need to wait till the end
- Click on Enable extension to complete the installation
Additional configuration
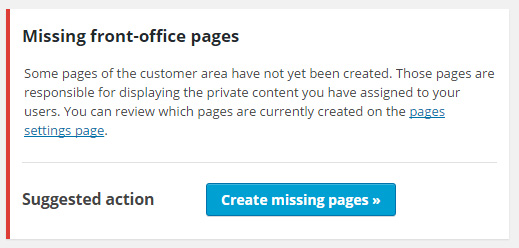
In order to be functional, some of our add-ons need some pages to be created. In that case, once the add-on is installed and active, you will see on your WordPress dashboard some notices from WP Customer Area telling you that some of your pages related to the plugin are missing and that your menu need to be synchronised. Click on the red button and follow the instructions.

You are now going to see a page telling you that some pages are missing for the installed add-on to work properly. Click on the Create missing pages button.

Once you have those pages created, you will see a new notice telling you that the previously created pages are missing from your WP Customer Area navigation menu. Click on the Synchronize menu button to add them.

Congratulations, you have just installed an add-on for WP Customer Area.

